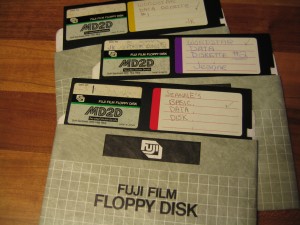
 This post is a careful log of how I rescued data trapped on 5 1/4″ floppy disks, some dating back to 1984 (including those pictured here). While I have tried to make this detailed enough to help anyone who needs to try this, you will likely have more success if you are comfortable installing and configuring hardware and software.
I will break this down into a number of phases:
- Phase 1: Hardware
- Phase 2: Pull the data off the disk
- Phase 3: Extract the files from the disk image
- Phase 4: Migrate or Emulate
Phase 1: Hardware
Before you do anything else, you actually need a 5.25″ floppy drive of some kind connected to your computer. I was lucky – a friend had a floppy drive for us to work with. If you aren’t that lucky, you can generally find them on eBay for around $25 (sometimes less). A friend had been helping me by trying to connect the drive to my existing PC – but we could never get the communications working properly. Finally I found Device Side Data’s 5.25″ Floppy Drive Controller which they sell online for $55. What you are purchasing will connect your 5.25 Floppy Drive to a USB 2.0 or USB 1.1 port. It comes with drivers for connection to Windows, Mac and Linux systems.
If you don’t want to mess around with installing the disk drive into our computer, you can also purchase an external drive enclosure and a tabletop power supply. Remember, you still need the USB controller too.
Update: I just found a fantastic step-by-step guide to the hardware installation of Device Side’s drive controller from the Maryland Institute for Technology in the Humanities (MITH), including tons of photographs, which should help you get the hardware install portion done right.
Phase 2: Pull the data off the disk
The next step, once you have everything installed, is to extract the bits (all those ones and zeroes) off those floppies. I found that creating a new folder for each disk I was extracting made things easier. In each folder I store the disk image, a copy of the extracted original files and a folder named ‘converted’ in which to store migrated versions of the files.
Device Side provides software they call ‘Disk Image and Browse’. You can see an assortment of screenshots of this software on their website, but this is what I see after putting a floppy in my drive and launching USB Floppy -> Disk Image and Browse:
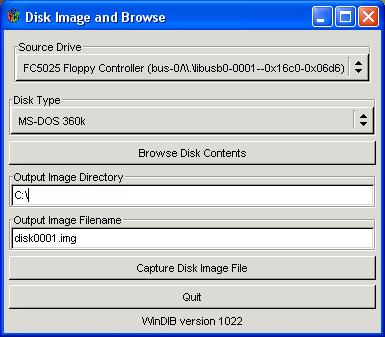
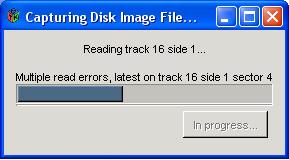
You will need to select the ‘Disk Type’ and indicate the destination in which to create your disk image. Make sure you create the destination directory before you click on the ‘Capture Disk File Image’ button. This is what it may look like in progress:
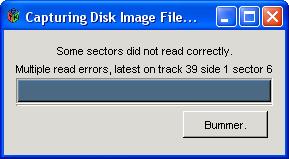
Fair warning that this won’t always work. At least the developers of the software that comes with Device Side Data’s controller had a sense of humor. This is what I saw when one of my disk reads didn’t work 100%:
If you are pressed for time and have many disks to work your way through, you can stop here and repeat this step for all the disks you have on hand.
Phase 3: Extract the files from the disk image
Now that you have a disk image of your floppy, how do you interact with it? For this step I used a free tool called Virtual Floppy Drive. After I got this installed properly, when my disk image appeared, it was tied to this program. Double clicking on the Floppy Image icon opens the floppy in a view like the one shown below:
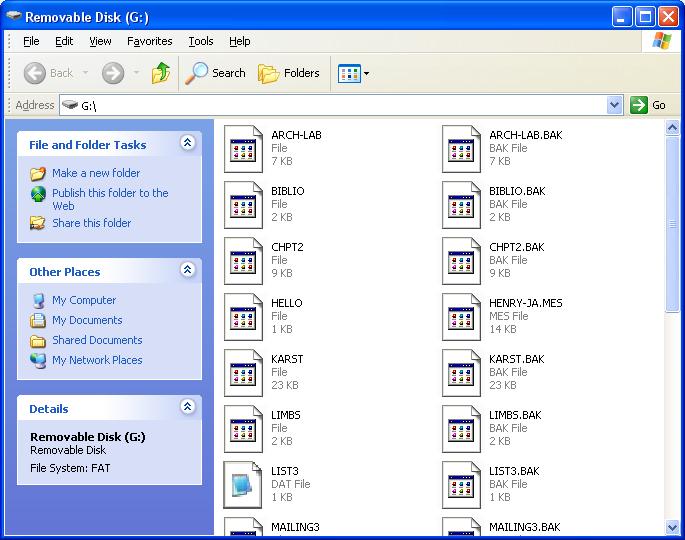
It looks like any other removable disk drive. Now you can copy any or all of the files to anywhere you like.
Phase 4: Migrate or Emulate
The last step is finding a way to open your files. Your choice for this phase will depend on the file formats of the files you have rescued. My files were almost all WordStar word processing documents. I found a list of tools for converting WordStar files to other formats.
The best one I found was HABit version 3.
It converts Wordstar files into text or html and even keeps the spacing reasonably well if you choose that option. If you are interested in the content more than the layout, then not retaining spacing will be the better choice because it will not put artificial spaces in the middle of sentences to preserve indentation. In a perfect world I think I would capture it both with layout and without.
Summary
So my rhythm of working with the floppies after I had all the hardware and software installed was as follows:
- create a new folder for each disk, with an empty ‘converted’ folder within it
- insert floppy into the drive
- run DeviceSide’s Disk Image and Browse software (found on my PC running Windows under Start -> Programs -> USB Flopy)
- paste the full path of the destination folder
- name the disk image
- click ‘Capture Disk Image’
- double click on the disk image and view the files via vfd (virtual floppy drive)
- copy all files into the folder for that disk
- convert files to a stable format (I was going from WordStar to ASCII text) and save the files in the ‘converted’ folder
These are the detailed instructions I tried to find when I started my own data rescue project. I hope this helps you rescue files currently trapped on 5 1/4″ floppies. Please let me know if you have any questions about what I have posted here.
Update: Another great source of information is Archive Team’s wiki page on Rescuing Floppy Disks.


